Step-by-step guide
Publish your academy and welcome your first students
From the moment you sign up until your students create their accounts. Nothing to pay during the trial, no tech skills needed.
- ~10 minutes in total
- 7 days free to try it
- From your computer or phone
Create your account
Sign up at tribhub.com
Go to tribhub.com, scroll down to the pricing section and fill in “Create your community”: your academy's name, your email, your WhatsApp and your community type.
Tap Create my community for free.
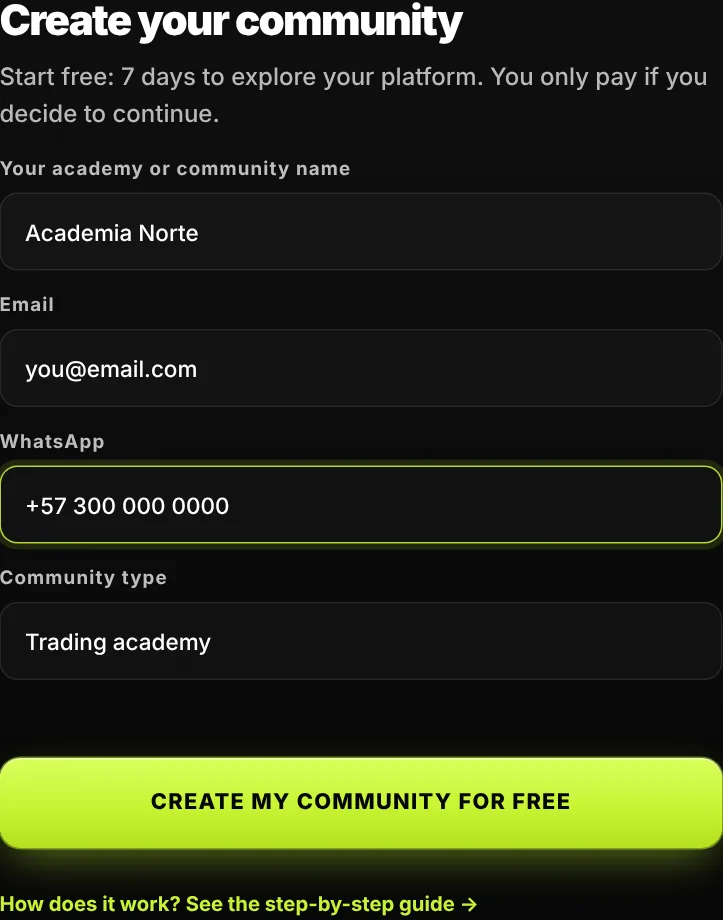
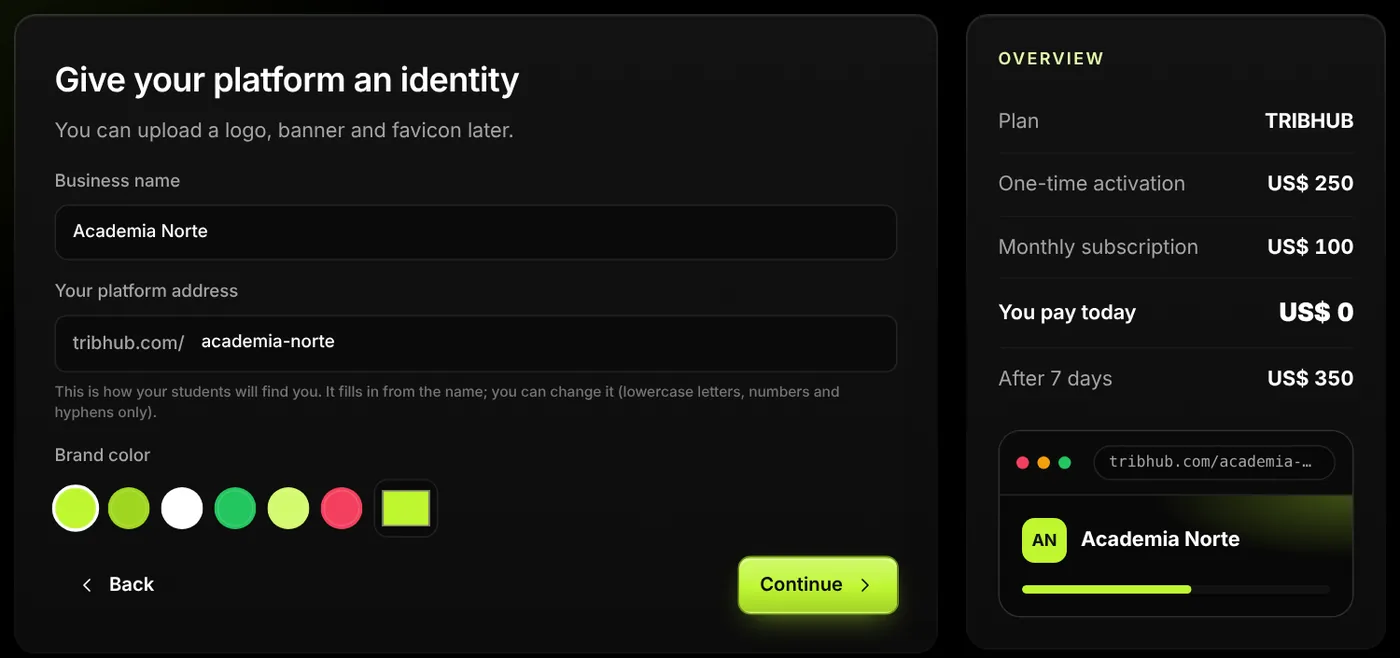
Complete the 4 sign-up steps
- Plan: you see the price. You pay nothing today.
- Your account: your name and a password (at least 8 characters, with letters and numbers).
- Your brand: your business name, the address of your academy and your color. The address fills in from the name and you can change it.
- Activation: you accept the terms.
Tap “Create my platform for free”
Your academy is created in seconds and you go straight to your dashboard. You get 7 days free: if you decide to continue, you activate it for a one-time US$ 250 plus US$ 100 per month. If not, it pauses and everything you created is saved.
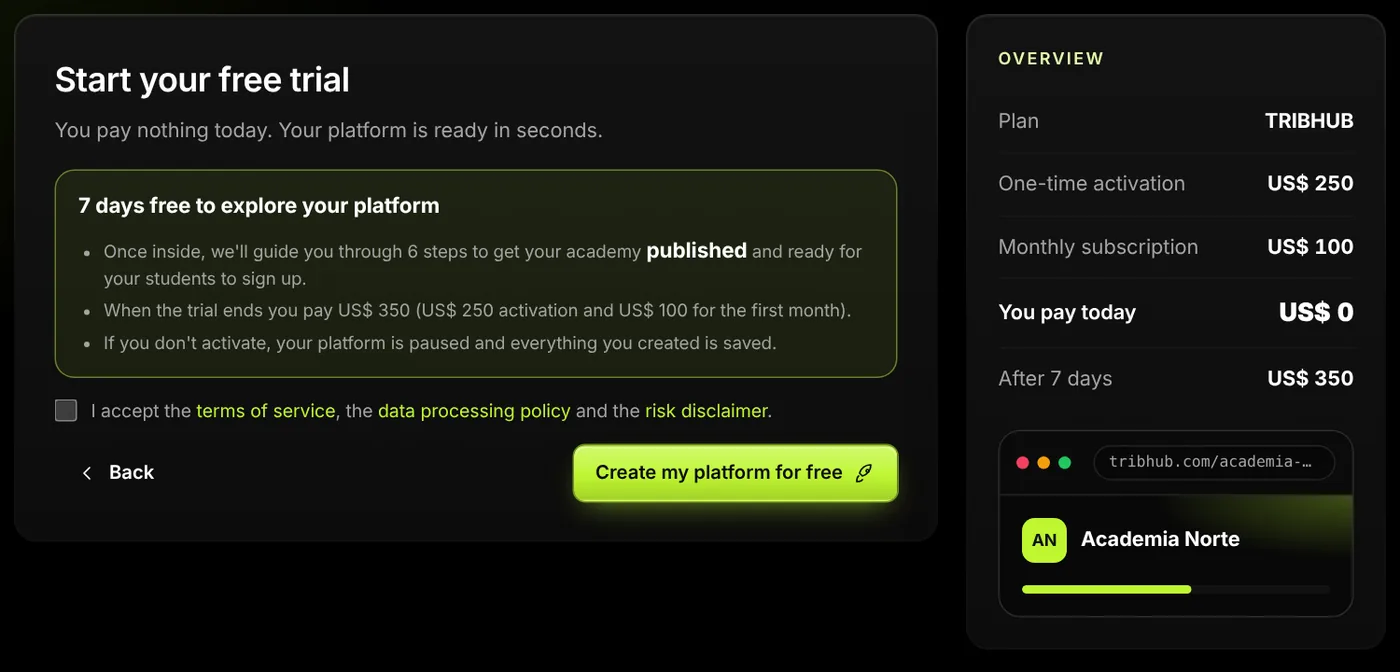
Set up and publish with the assistant
When you enter your dashboard, the assistant opens on its own: “Set up your academy”. It walks you step by step until your academy is published. On the left you always see which step you're on.
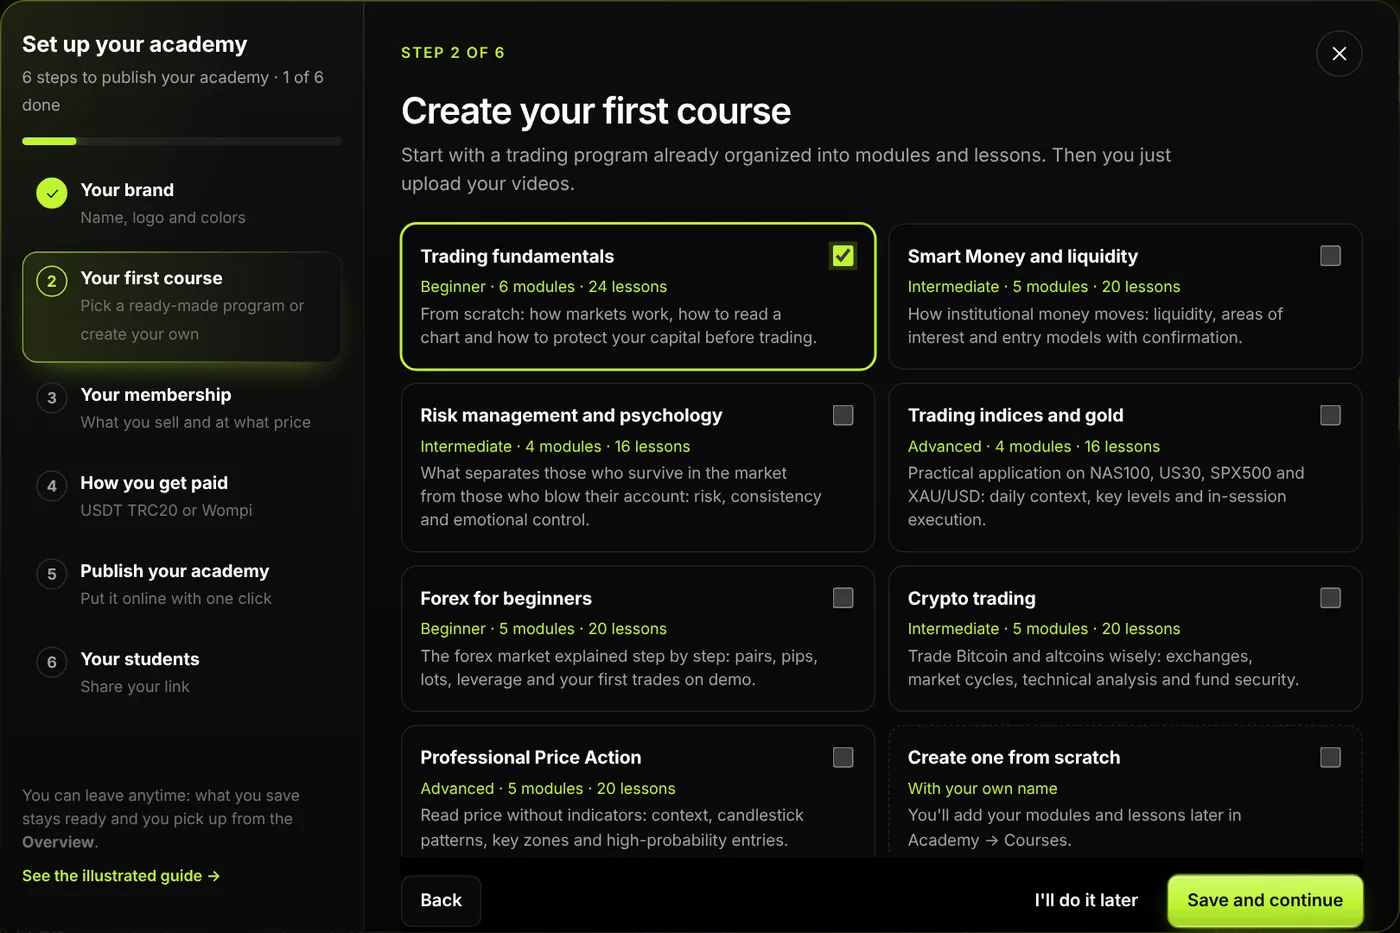
Choose your first course
Pick one or more trading programs already organized into modules and lessons: Fundamentals, Smart Money, Risk management, Indices and gold, Forex, Crypto or Price Action. You can also create one from scratch.
Tap Save and continue. You upload your videos later in Academy → Courses → Lessons.
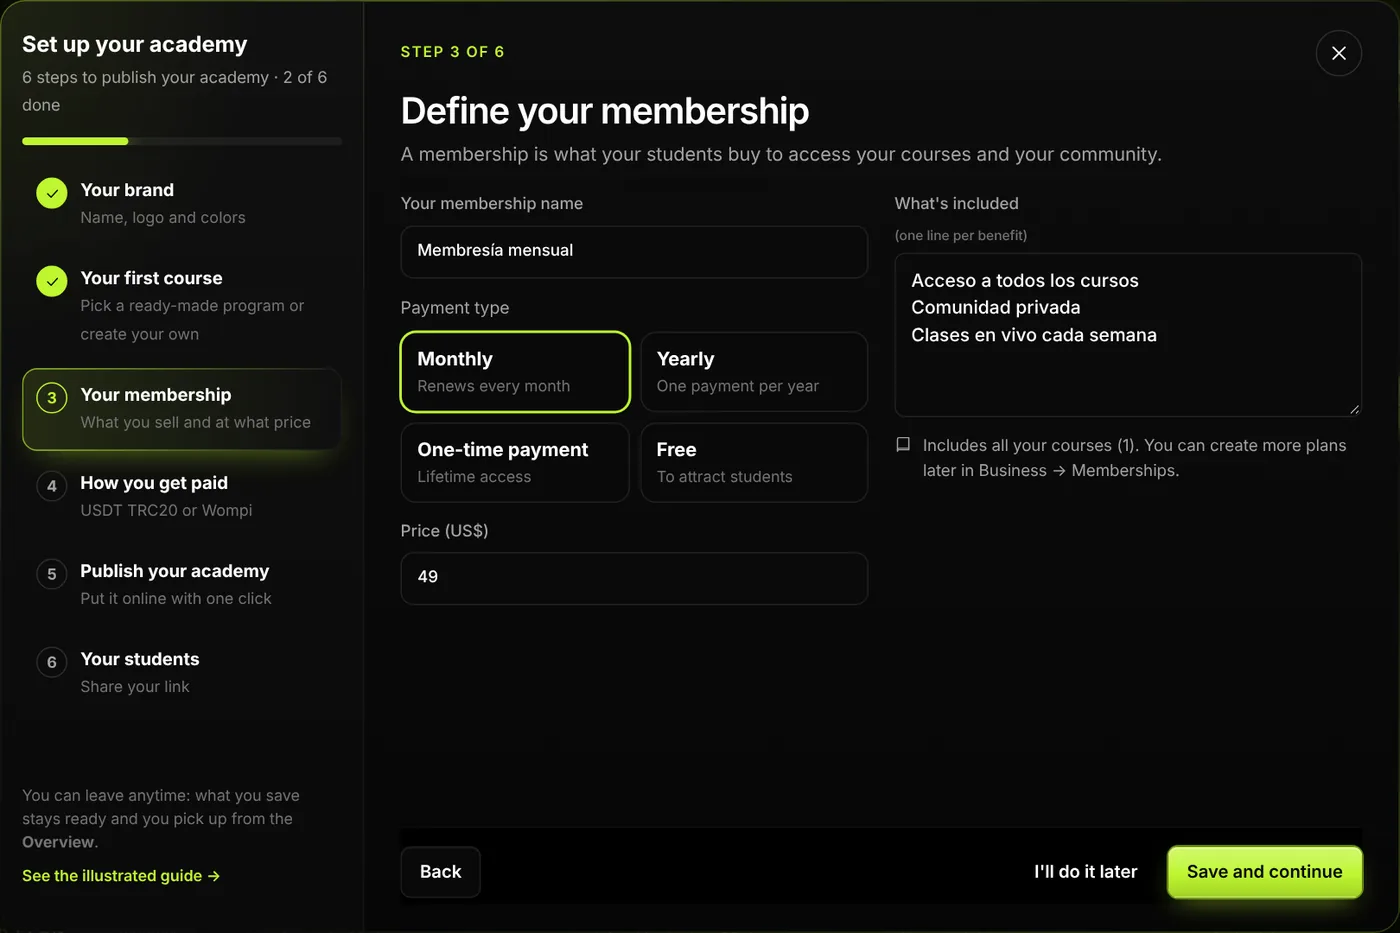
Define your membership
It's what your students buy to access your courses and community. Set the name, the billing type (monthly, yearly, one-time or free), the price and what it includes.
The membership automatically includes all your courses.
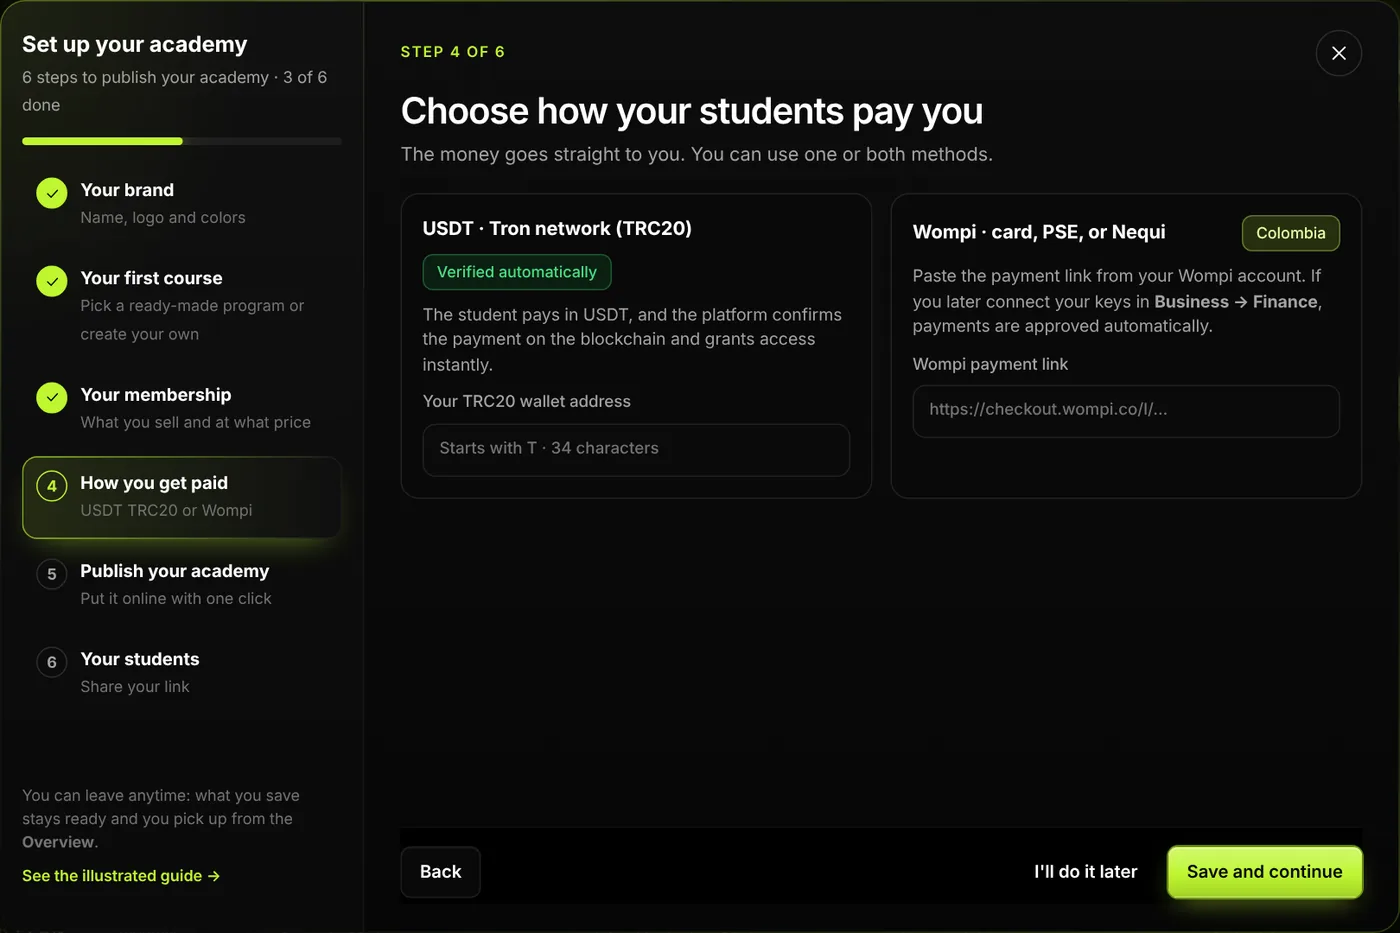
Choose how you get paid
- USDT · Tron network (TRC20): paste your wallet address. Payments are verified automatically on the blockchain and the student gets access instantly.
- Wompi (card, PSE or Nequi, in Colombia): paste your payment link.
The money goes straight to you. You can use one or both.
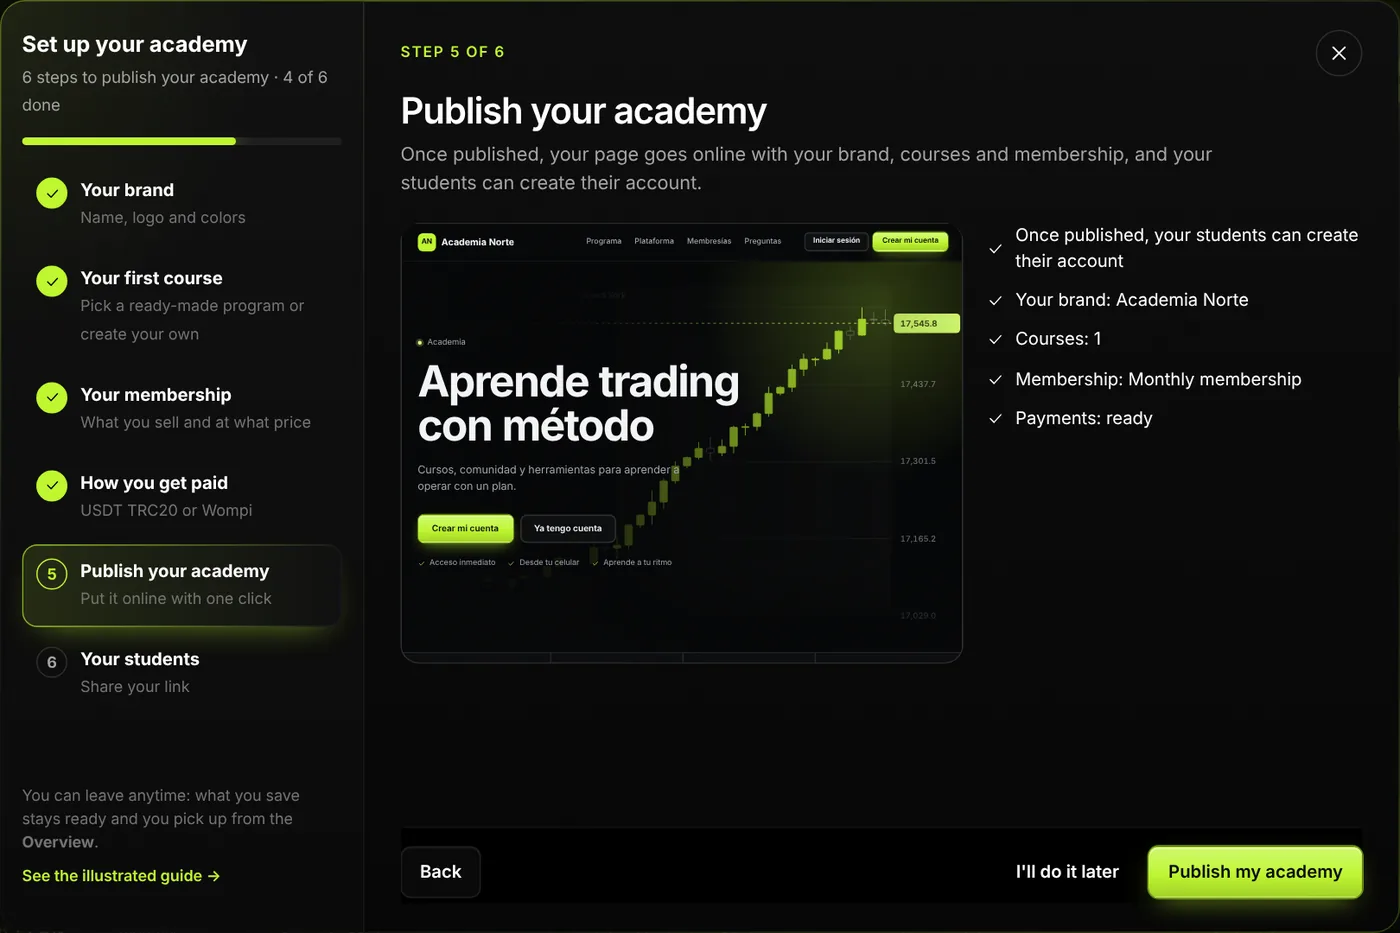
Publish your academy
You see how your page looks: your brand, your courses and your membership. Tap Publish my academy.
From that moment your page is online and your students can create their accounts.
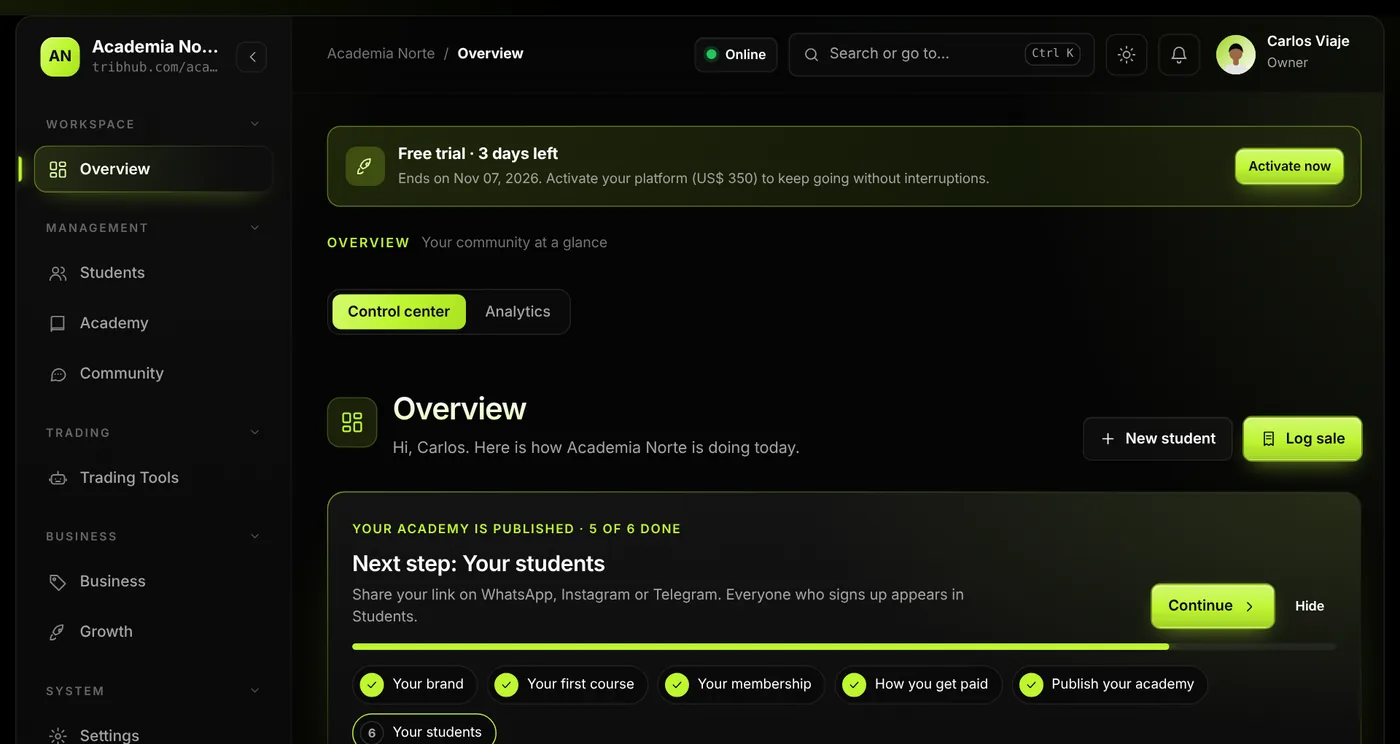
Check that it's “Online”
In the top bar you'll see ● Online. Tap it to:
- view your page;
- copy your sign-up link;
- open or close registrations;
- unpublish it if you need to.
Welcome your students
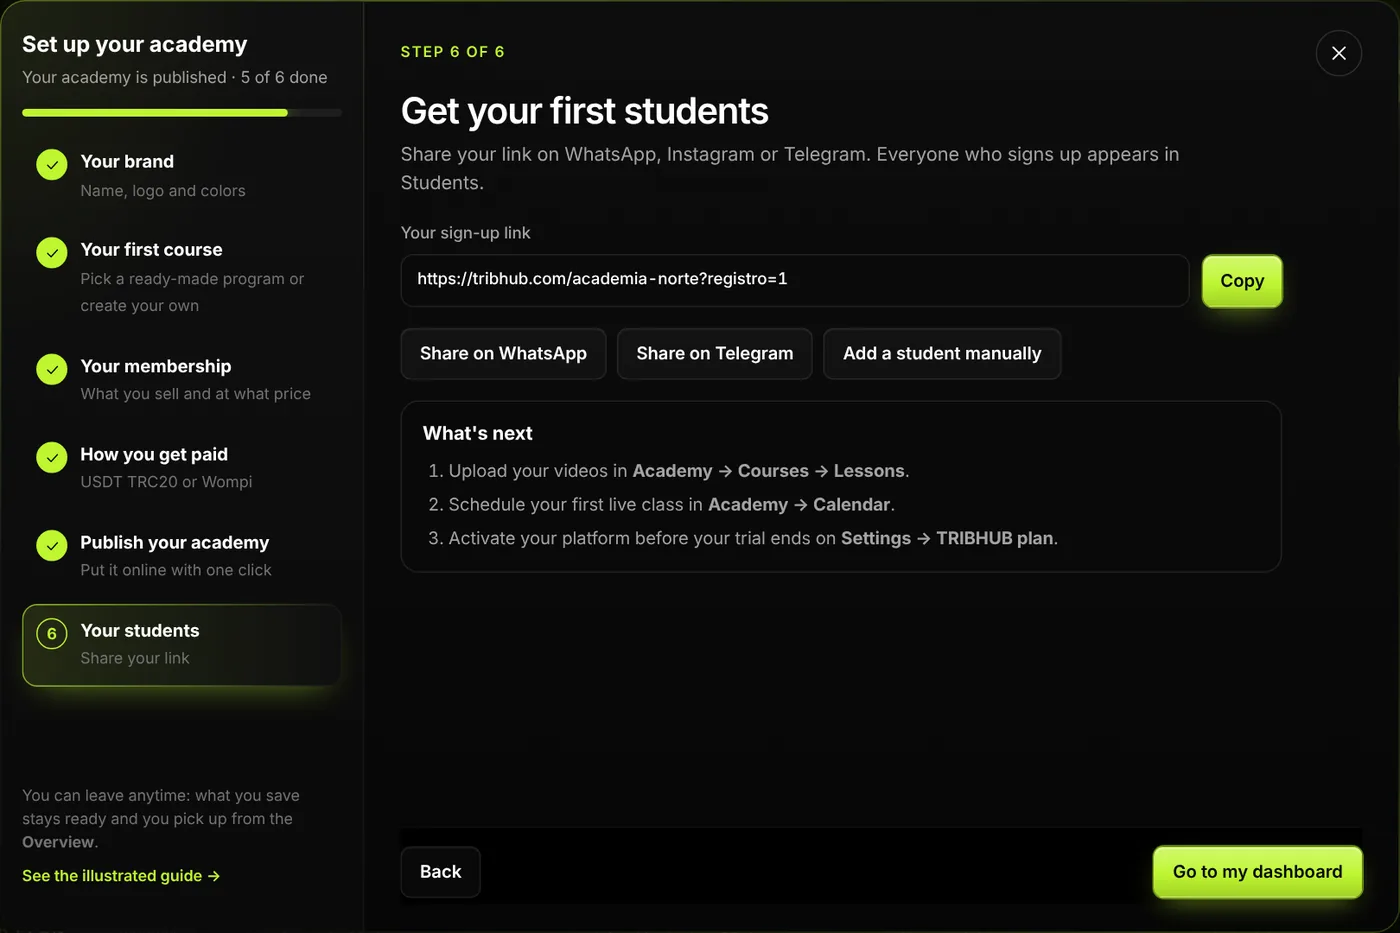
Share your sign-up link
In the assistant's last step you get your link ready, for example tribhub.com/myacademy?registro=1. Share it on WhatsApp, Telegram or your social media.
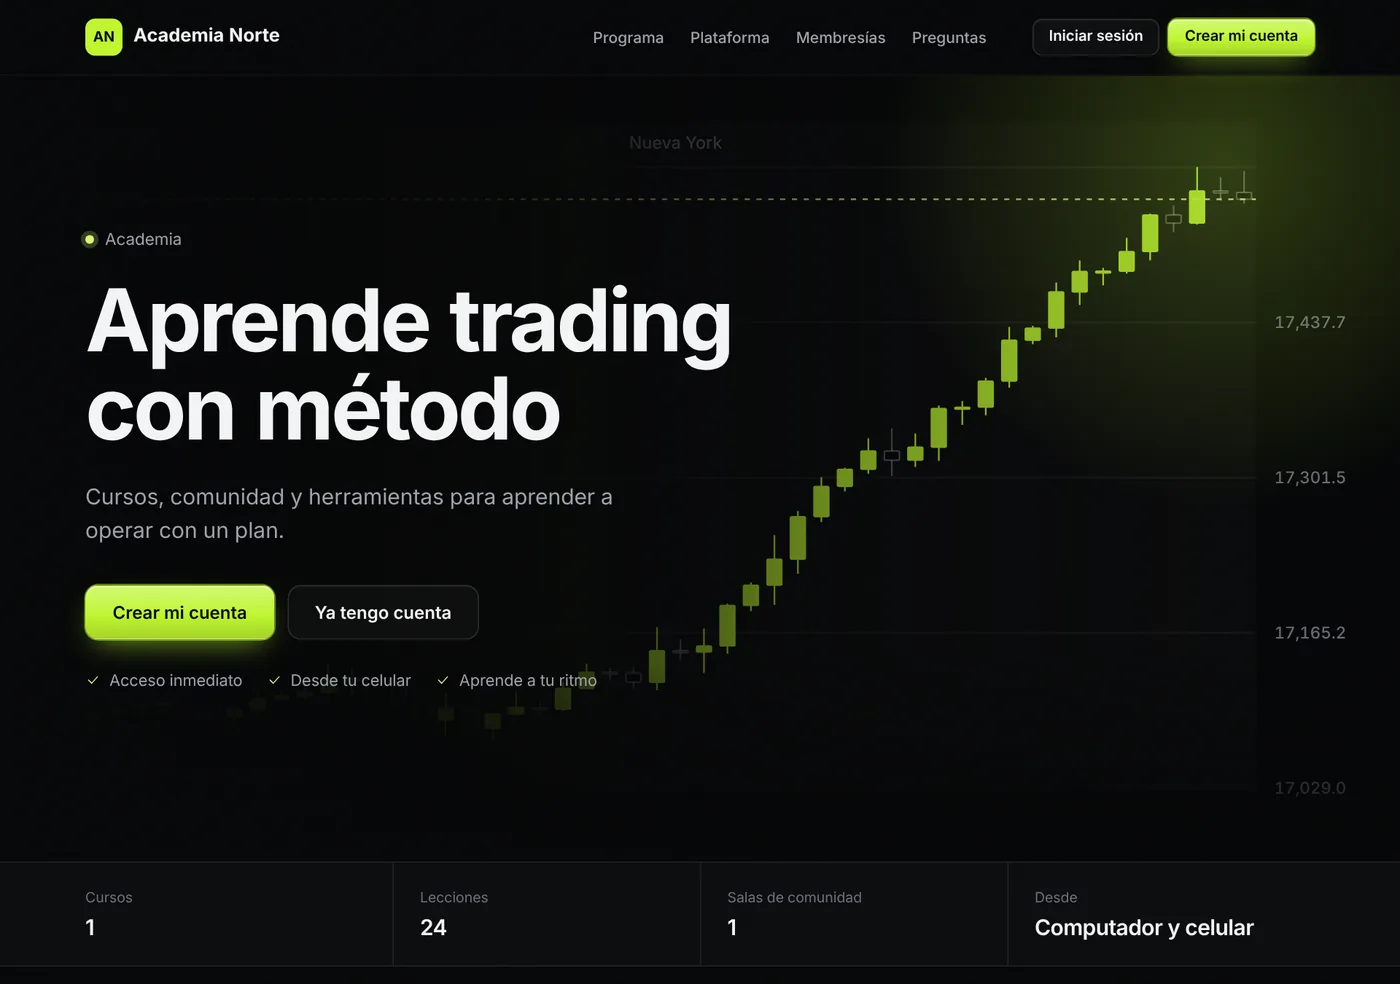
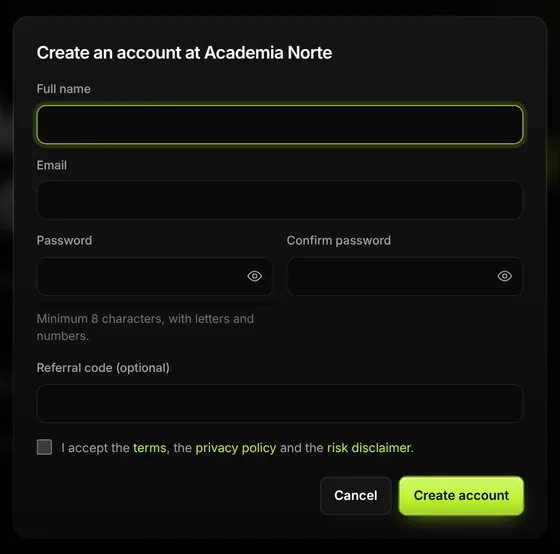
That link opens the account sign-up form directly.
Your students sign up on their own
Your student visits your page, taps Create my account and enters their name, email and a password.
- The student receives a welcome email.
- You get an email notice.
- In your dashboard they appear in Students.
When they pay for their membership, their access is activated automatically.
What's next
- Upload your videos in Academy → Courses → Lessons.
- Schedule your first live class in Academy → Calendar.
- Activate your platform before the trial ends in Settings → TRIBHUB plan.
Frequently asked questions
I closed the assistant. How do I open it again?
In the Overview of your dashboard you'll see the “Set up and publish your academy” card. Tap Continue and pick up where you left off.
Can I publish before everything is ready?
Yes. You can publish anytime with the Publish academy button at the top and finish courses or payments later.
I forgot my password
On your academy's login screen tap Forgot your password?. Enter your email or your academy's name. The code arrives at the email you signed up with, and when you enter it you go straight in.
Can my page be in English?
Yes. In Settings → Brand and page → Public page you choose Spanish or English. Your dashboard can also be used in English from My account.
Can I use my own domain?
Yes. Besides tribhub.com/youracademy, you can connect your own domain from Settings → Brand and domain.
How do I close registrations?
Tap ● Online in the top bar and uncheck Registrations open. Your current students keep logging in as usual.
Your academy, online today
Create your account, follow the assistant and share your link. You get 7 days free to try everything.